If you want to make a copy of a website that have same functions and plugins like live website you can make staging site.
Staging site in bluehost is a copy site on which you can work without making changes on your live site.
This is useful if you want to check and test something without influencing on your live website.
I have made a tutorial how to make that on Bluehost hosting provider. Usualy you will find that there is option to make staging site over button click, but when I have try to do it I have received information from Bluehost that option is currently not available.
So, I decided to make staging site manually because it is good to know these things if you want to become a blogger. I have learned a lot when I have made staging site for my site.
Let’s start.
The first thing is to log on into your bluehost admin area where you can select File Manager like it is shown on the image below.
When you enter into File Manager you will see your folders. If you are for the first time here then you probably do not know a lot about these folders. This article is not about folders so I will not get into it to much.
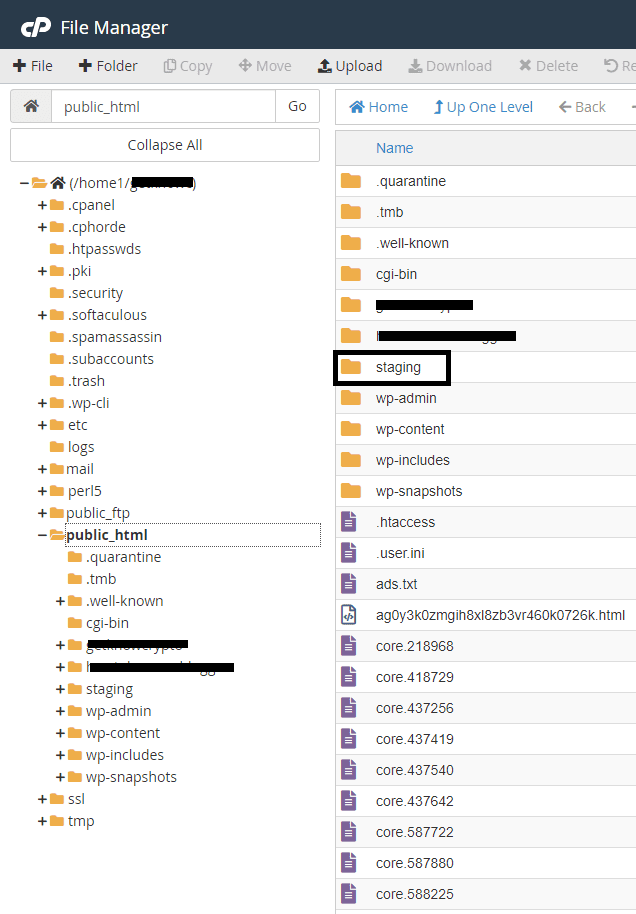
For now you need to make a new folder inside public_html folder. New folder can be named as you wish, but I suggest naming it “staging” for easier following of this tutorial.
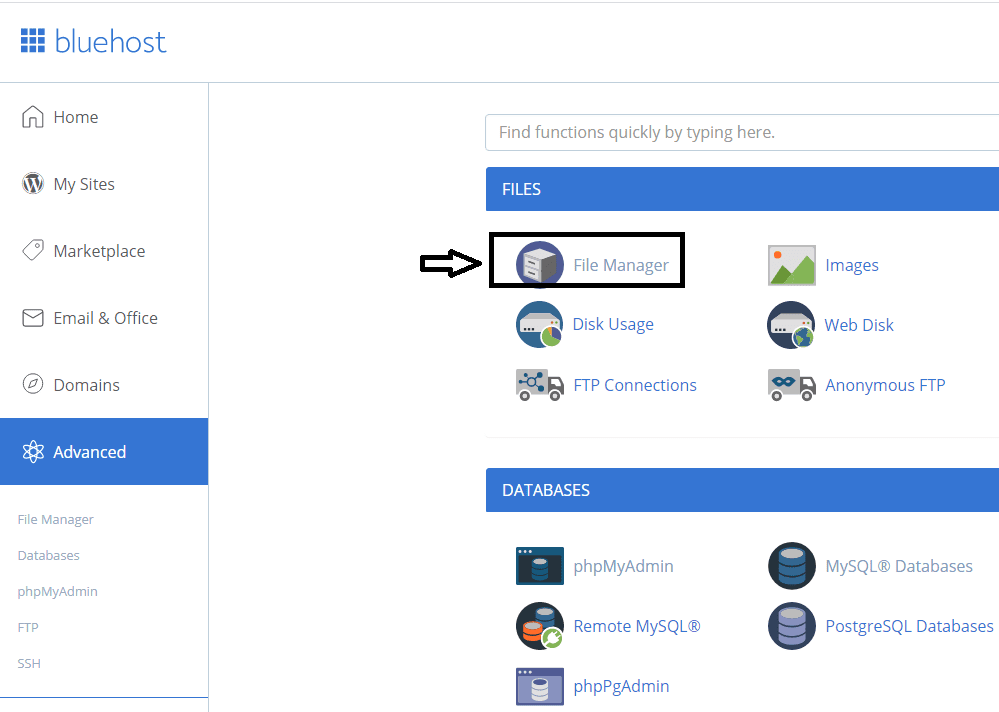
Image below shows you the list of folder inside public_html folder. I have alredy created staging folder, but on the image below this image you will see how to make staging folder.
On the upper left corner you have option to create new folder “+Folder”. Click on it and you will have new window in which you need to enter new name for new folder. Put the name “staging” and press the button “Create New Folder”.
Immediately you will have new fodler inside public_html folder.
Next step is to select all from public_html folder. Everything except “staging” folder.
Copy all those files inside “staging” folder.

When you copy all files from the public_html folder into “staging” folder you need to change some files.
File you need to change inside staging folder is called wp_config.php.
Select that file and on when the file is selected, on the upper right corner you have a button “Edit”. You need to press that button in order to edit wp_config file.
Click on the Edit button and you will have new small window that explains to you to backup original file. You do not need to do anything except click on the bottom right corner where “Edit” button is located.

When you click on the edit button you will have wp_config file open in which you need to change some files.
I have marked places where you need to enter new data.
You need to change three settings. First one is database name, second is user name and third one is password for the database.
Data I have entered on the image below is the data you use if you want. You can put inside your own data but write them down because you will need those.

When you are done with the new data inside wp_config file, you need to save those data. On the upper right corner you have save button. When you are done with saving you can close that window.
Now you need to create new database.
Go to bluehost menu where you have MySQL databases menu.
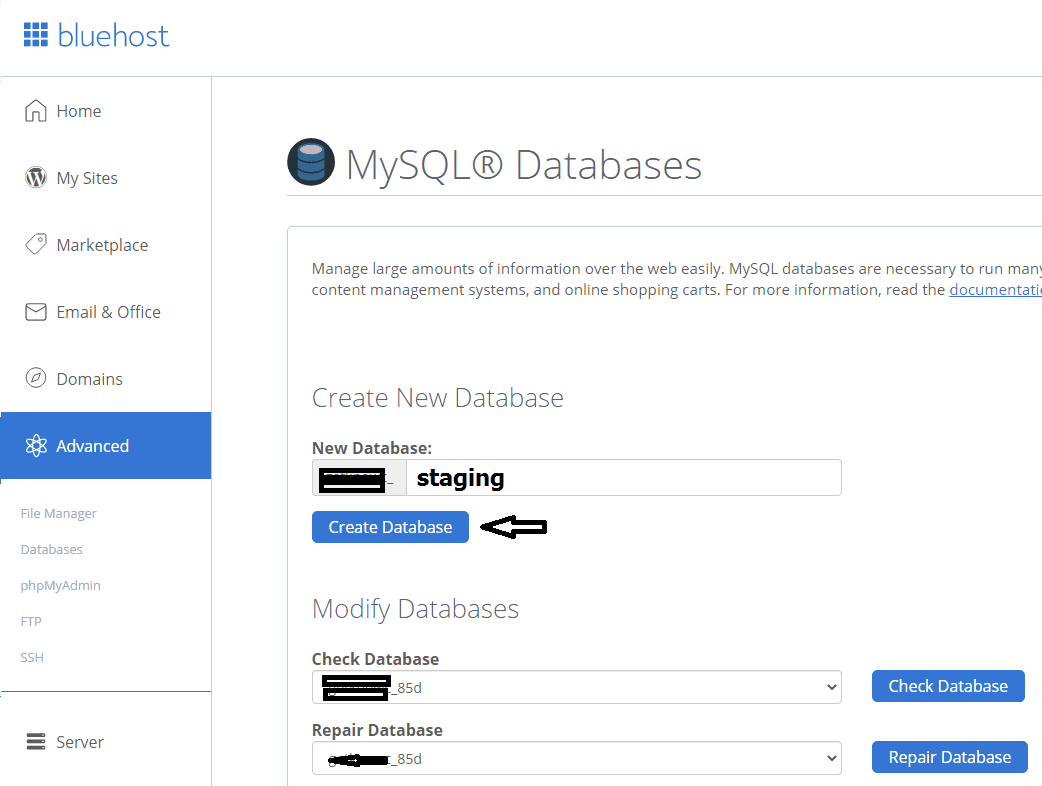
Click on it and you will have menu like on the image below.
Here you need to enter the name of the new databe. Put the same name you have put inside wp_config file in the previous step.
When you have entered database name press “Create Database”.
When you do that new database will be created and when you scroll down you will see the new database.
For the database you need username and password. These two data you will create by scrolling down and you will see the menu.
Enter new username and password, same as in wp_config file, and click on the “Create User”.

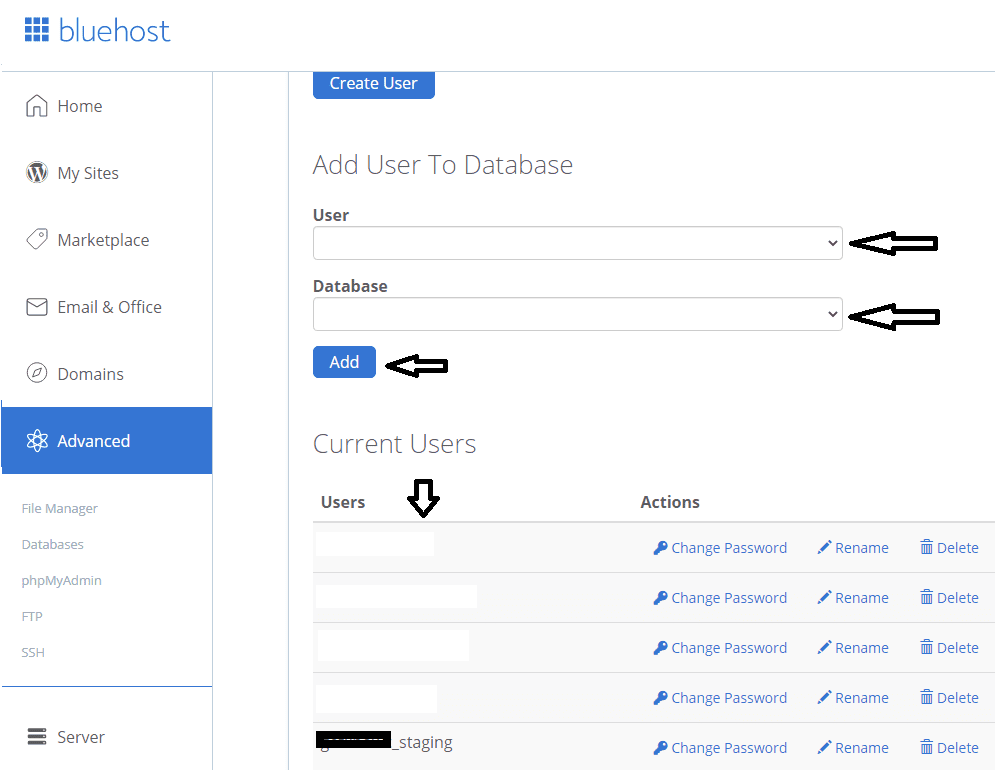
When you are done with new username and password go down and you will need to select new username and add it to new database.
Enter the username you have created and select the database you will connect new username to.
Click on the “Add” button and you will connect new username with new database.
When you are done with database and username and password you need to change some setting inside pgpMyAdmin.
Go to Bluehost menu and select phpMyAdmin menu.
You will open new window like on the image below where you will see on the left your new database.
Click on that new database and on the right side you will have a list of files inside that database.

On the right side find the file that ends with _options.
Click on it and new window will open with all files inside that file.

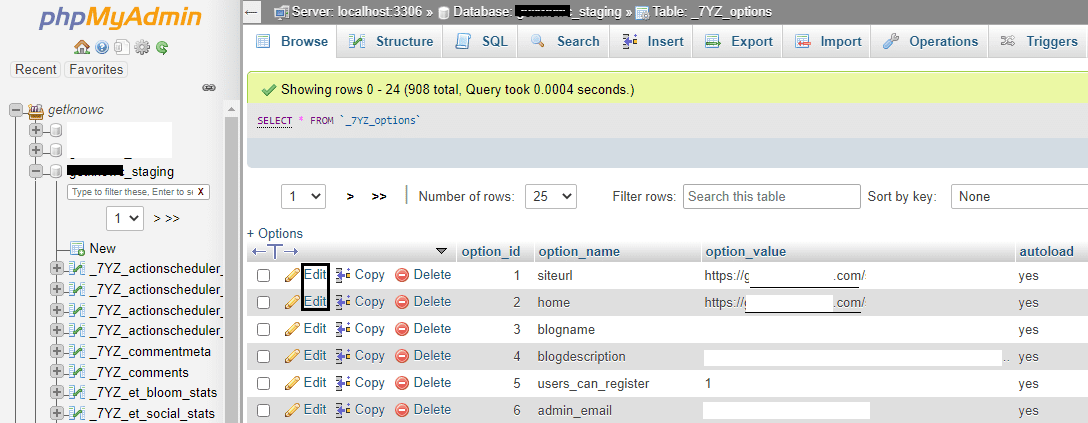
First two rows shows you siteurl and home option name.
You need to change the url inside both files.
To make that happen you need to click on the “Edit” button that is located inside each row on the left side, at the beginnig of the row.
First click for the siteurl option and new window will appear.
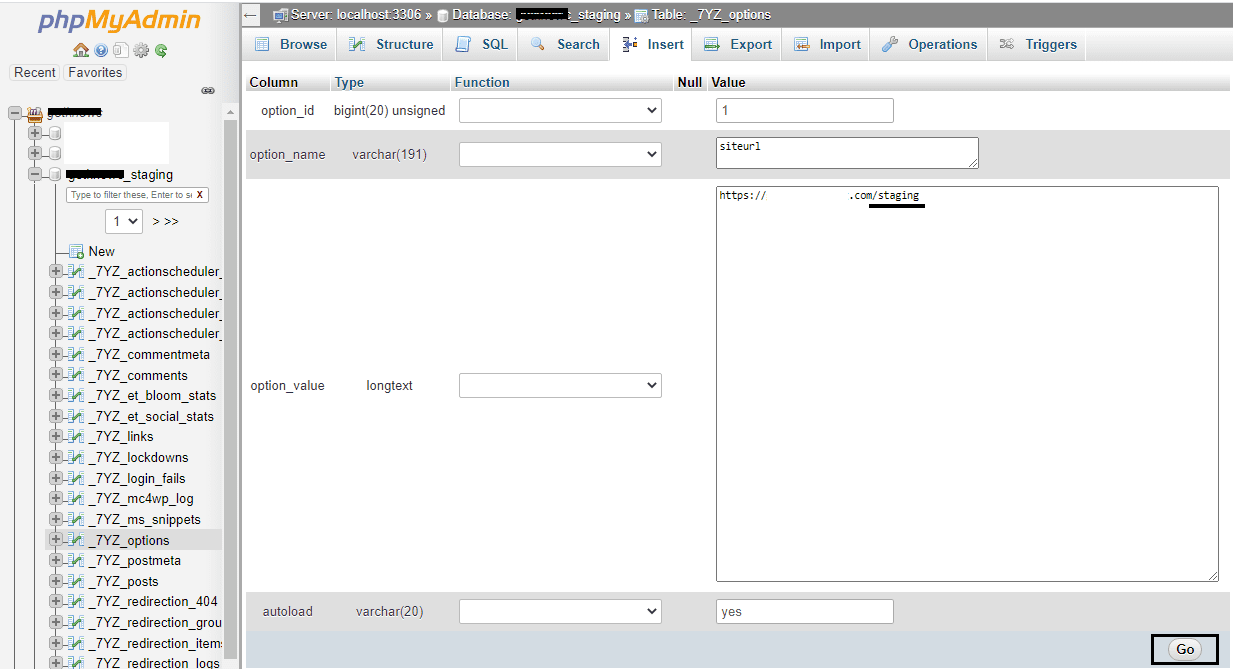
On the right you will see current url of your webiste. You need only to add /staging on the end and click on the “Go” button.
Go button is located on the bottom right side of that window.
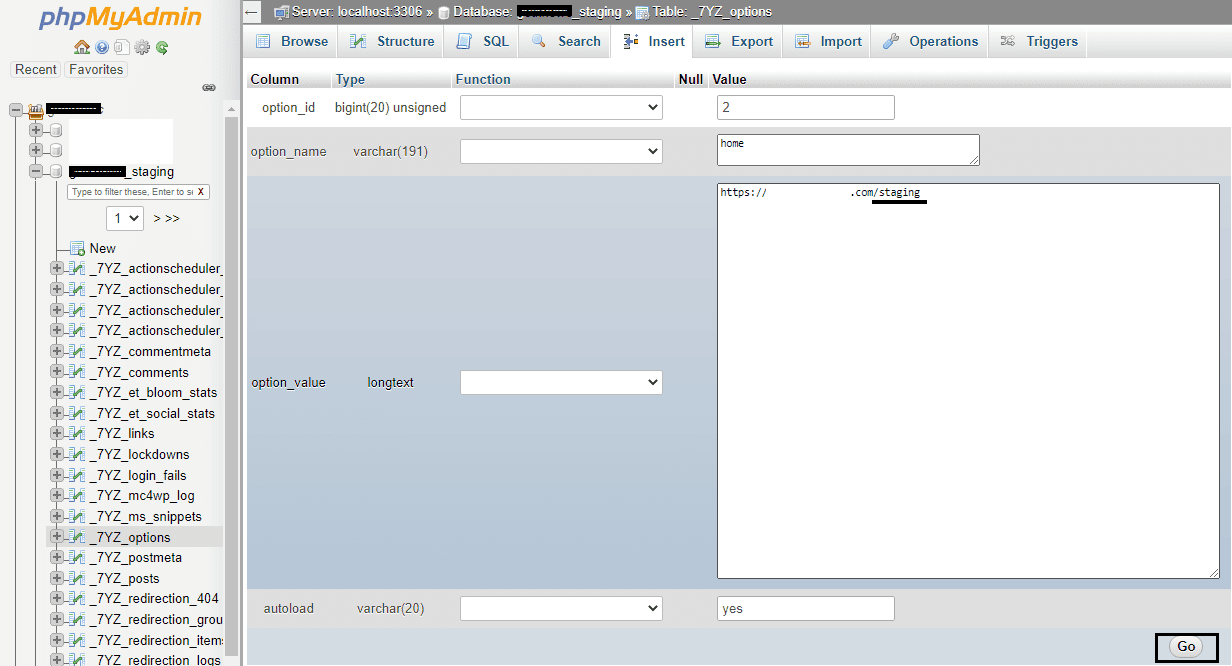
When you are done click on the next row where home option is.
When you click on the home option you will have same window where you need to add staging word.
Click on the “Go” button and you can exit from the phpMyAdmin.
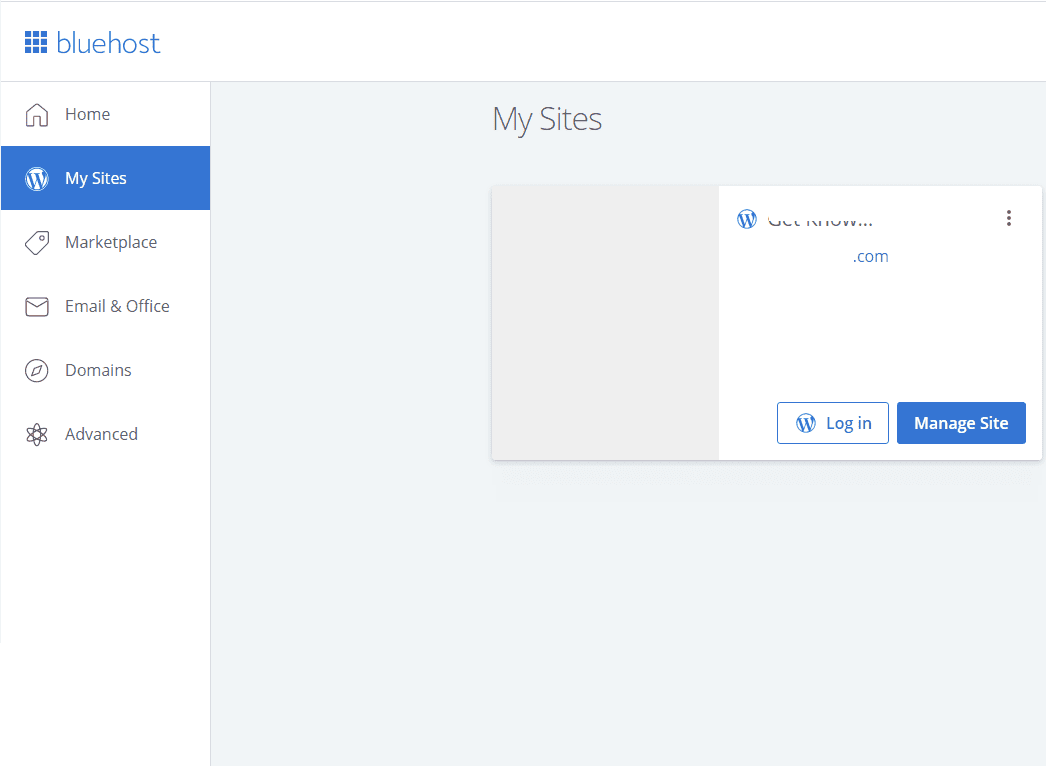
Go to Bluehost menu and click on the mY Sites menu.
THere you will have few options to log in. Your original website and staging site. Click on the staging site and login into wordpress.
When you enter into wordpress staging site you will see similar to page on the image below.
In the browser you will have your original site with sufiy staging. That is the sign that you are in staging site and everything works just fine.
You need to change permalink of your pages and post. To change that you need to go to settings->pemralink.

Inside permalinks settings you need to select option like on the image below.
When you are done click on the save and you can test your staging site.


0 Comments